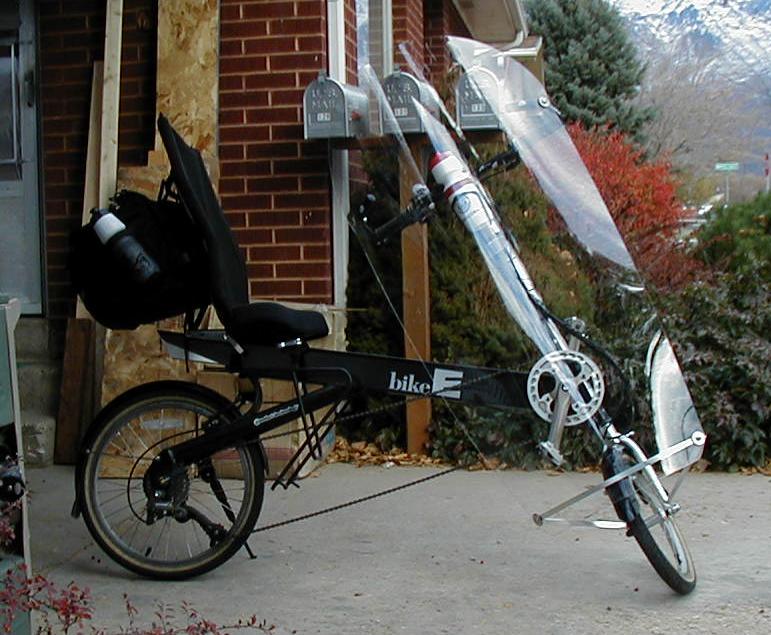
Here is a front view of the fairing and a side view of the bike. With the fairing on, the front wheel doesn't want to stay pointing forward. This only seems to be a problem with the bike is stationary. I've not noticed any trouble while rolling.
I got the idea from Rick Wasserman. He made a similar fairing for his Tour Easy.
Here is a front view of the fairing and a side view of the bike. With the fairing on, the front wheel doesn't want to stay pointing forward. This only seems to be a problem with the bike is stationary. I've not noticed any trouble while rolling.
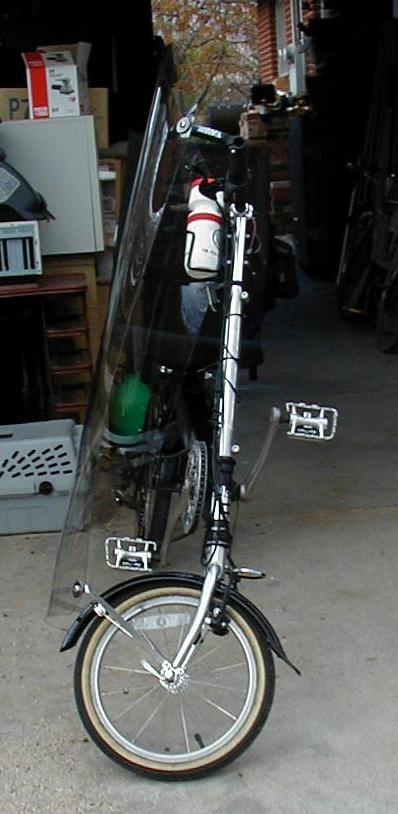
And a side view of the fairing and front view of the bike.
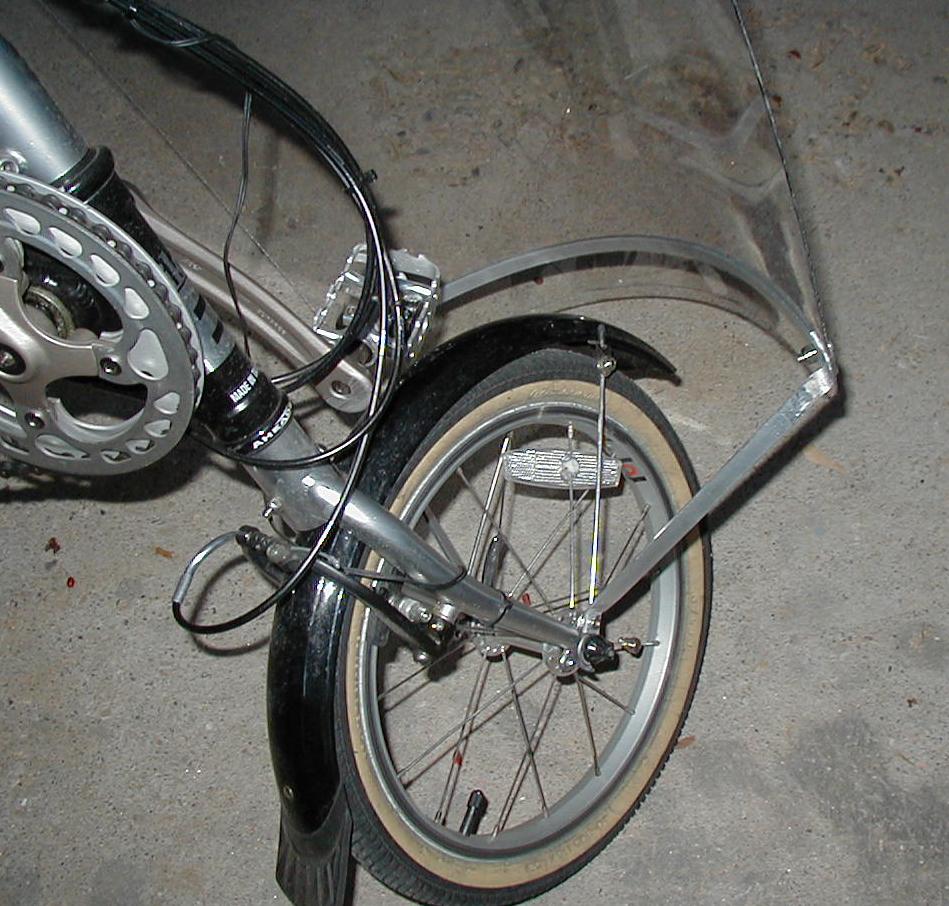
The front fork mounting bracket is quite simple. I used 1/2" wide, 1/8" thick aluminum strap, and bent it to shape with vice grips. I used a mapp gas torch to head the bent metal, and relieve the stress of the bending. That probably wasn't necessary, but it seemed like a good idea.
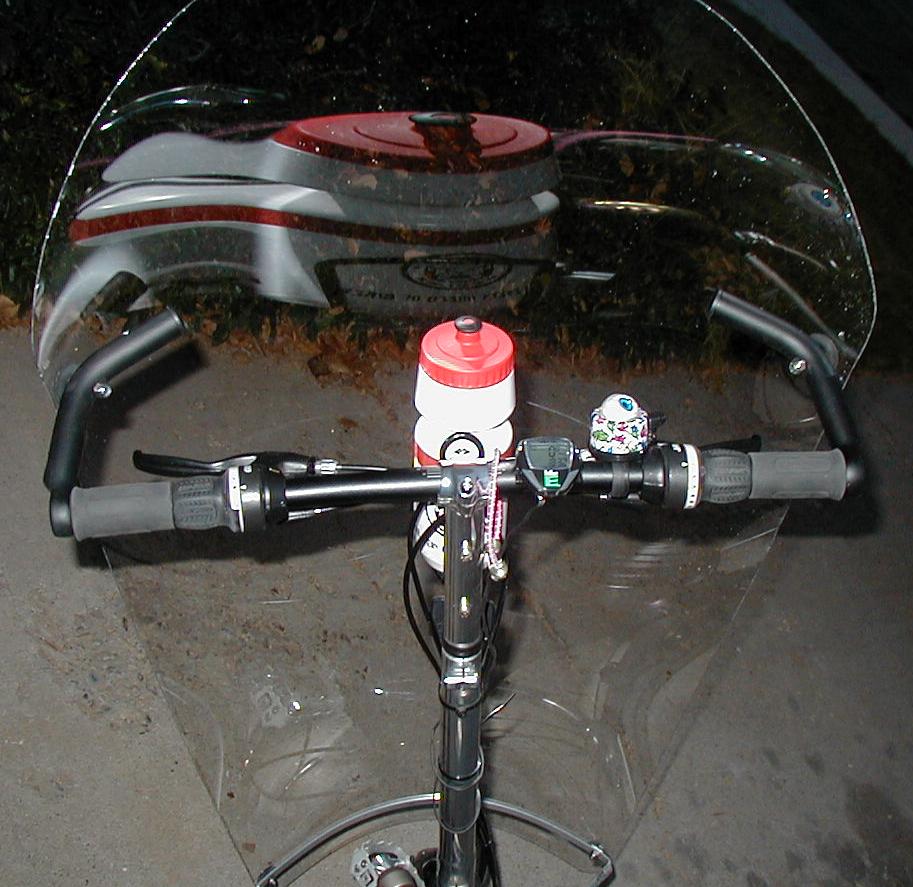
I replaced the stock handle bar / riser "T" with a top loading stem, and a set of handle bars and bar ends from Nashbar. The stock setup seemed a little narrow to begin with, I didn't figure I could afford to lose 1/2" on each side. As a side benefit, the bike seems more stable now. At least the steering is less sensitive. Thisactually makes sense, the longer handlebars place my hands further from the pivot point, thus I must move my hands further to the the same amount of turn as with the stock steering setup.
| Parts List | |||
| Qty. | Description | Each 1 | Total |
| 1 | Top loading stem | 40.00 | 40.00 |
| 1 | Nashbar Mountain Bar | 15.00 | 15.00 |
| 1 set | Profile Design Boxer Bar Ends | 13.00 | 13.00 |
| 1 set | Accessory Braze-on Bolts | 0.75 | 0.75 |
| 4 | Stop Nuts, Stainless | 0.42 | 1.68 |
| 4 | 1/4" Fender Washers, Stainless 2 | 0.70 | 2.80 |
| 2 | 1/4" X 3/4" Philips, Pan Head Bolts, Stainless | 0.25 | 0.50 |
| 2 | 1/4" X 1 1/2" Philips, Pan Head Bolts, Stainless | 0.36 | 0.72 |
| 4 | Rubber Washers, 1/4" ID, 1 1/4" OD 3 | 0.34 | 1.36 |
| 1 | 1/8" X 1/2" X 9' Aluminum bar stock4 | 5.67 | 5.67 |
| 1 | 48" X 96" X .06" Polycarbonate Sheet5 | 45.00 | 45.00 |
Here are the drawings for the bottom bracket, and for the polycarbonate skin. I've included the dxf files for each of these.

This is a layout diagram for the bottom bracket. The blue lines denote where bends should be made. The red line is the center, the diagram shows only half of the bracket. You will have to work out the angles for the bends, for your self. Also, there is a twist that needs to be made in the stay on each side of the middle. This you will also have to work out for yourself.
fairing_bottom_bracket.dxf
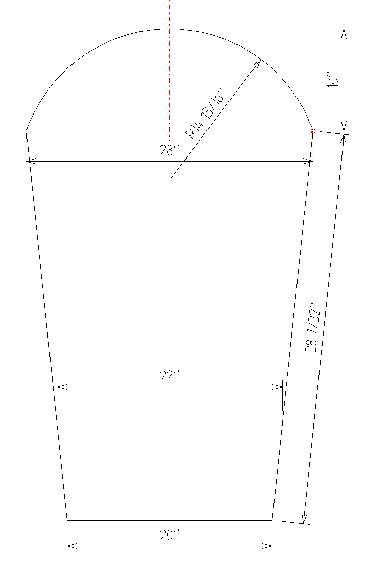
I used .06" thick polycarbonate, if I do it again, I may try the thinner .04" sheeting. I think the .06" may be stiffer than is necessary, as well as heavier than necessary. Althought it's not showen in the drawing, I rounded the corners some. In the pictures it looks like I simply clipped the bottom corners, but they realy are rounded.
fairing_polycarbonate.dxf
I've heard from several others that they have used auto door trim around the edges of their fairings. I am strongly considering doing the same thing. That would provide a much cleaner, finished look.
Comments or suggestions: redbeard@xmission.com
Last changed:
© 2002 Dan Maker